Authorization
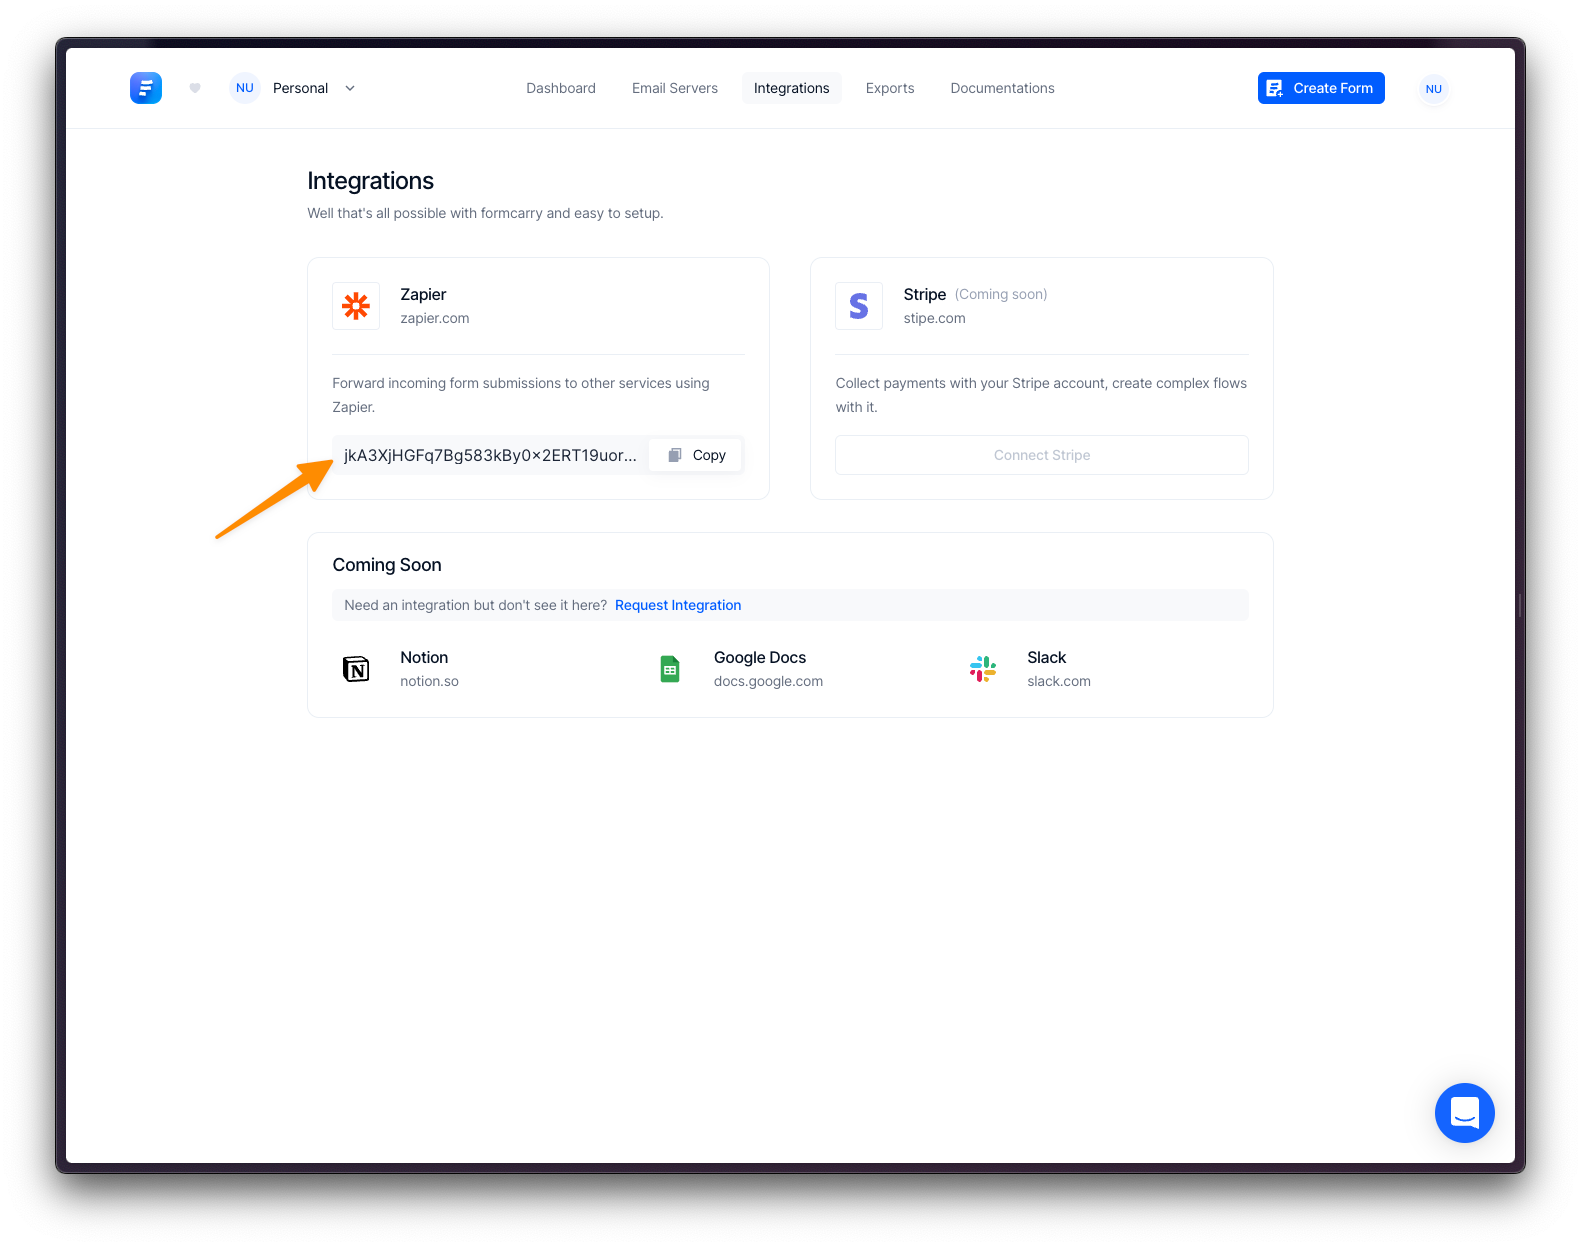
Internal API works pretty easy to begin with, every team has an API key that can be found under Integrations.

Copy this key first, you are going to use it for authorization along the way.
Example Authorization:
Please pass your api_key in request header at every request you made to the API
With curl:
shellcurl -H "api_key: YOUR_API_KEY" https://formcarry.com/api/auth
With Javascript:
javascript// Create an object to store the request headers
var headers = {
    "api_key": "Change With Your API Key"
};

// Use the fetch API to send a request with the specified headers
fetch("https://formcarry.com/api/auth", {
    headers: headers
})
.then(function (response) {
    // Print the response to the console
    console.log(response);
})
.catch(function (error) {
    // Print any error that occurred
    console.error(error);
});
Example Response:
json{
	"status":"success",
	"message":"You are successfully authenticated, please pass your api_key in every requests header."
}
Creating a new form with API
API Endpoint: https://formcarry.com/api/form
Method: PUT
Headers: api_key (Please add api_key into the request header otherwise you’ll get an error)
Accepted Body Parameters: Please put them inside the body of your request.
Parameter Name | Type | Description | Required? |
name | String | Name of the form | Yes |
email | String | Email addresses that you want to receive self respondent notifications
Replace multiple addresses with comma like:
hi@mycompany.com, lisa@mycompany.com | No |
returnUrl | String | Thank you page URL that you want to redirect your users after a successful submission, that’s an optional argument.
If you don’t pass anything, formcarry will use built-in Formal template, check out official Docs for more information. | No |
failUrl | String | Failed page URL, that you want to redirect your users after a failed submission, that’s an optional argument.
That should be present if returnUrl present. | No |
returnParams | Boolean | Enable sending form message in query string to Return URL (if specified) that can be used for showing user message in your thank you page. To show something like “Thank you John, We’ll get back to you ASAP” | No |
googleRecaptcha | String | Pass your Google Recaptcha secret key to enable Google Recaptcha, if you provide wrong key your form will not work! Check out our documentation for ReCaptcha for more information | No |
webhook | String | Webhook URL, formcarry will send a POST request to this URL when you receive a new submission. | No |
retention | Boolean | Save incoming submissions to formcarry database. On disable Zapier Integration, Webhooks and Email Notifications will continue to work, but formcarry won’t save anything to it’s database. True by default. | No |
ㅤ | ㅤ | ㅤ | ㅤ |
Thank You Page Parameters | Don’t pass anything here if you are going to use Return URL feature, that’s for changing Formcarry Thank You Templates. If you pass returnUrl then formcarry won’t use built in templates so make sure you don’t pass returnUrl for that case. | ||
thankYouPage_theme | “Fancy” or “Formal” or “Sweet” | Pass one of “Fancy”, “Formal” or “Sweet” to use built-in Formcarry Thank You Pages. | No |
thankYouPage_headline | String | The headline of the thank you page. e.g “Thank you for contacting us!” | No |
thankYouPage_message | String | Message of the thank you page, e.g. “We have received your submission.” | No |
thankYouPage_mode | “Dark” or “System” or “Light” | That will enable choose Light or Dark mode for thank you page. System will detect users device settings and correspond to it. Default is Light | No |
thankYouPage_returnText | String | Text of primary button of thank you page, defaults to “Return” | No |
thankYouPage_returnUrl | String | URL that formcarry should redirect when user clicks to primary button, that’s default to user referer header. | No |
thankYouPage_logo | Not available yet. | ||
ㅤ | ㅤ | ㅤ | ㅤ |
Self Email Notification Parameters | |||
selfEmail_theme | “Fancy” or “Formal” or “Custom” | Choose one of Self Email Notification Templates. | No |
selfEmail_code | String | If you pass selfEmail_theme as Custom then you can pass your HTML Email Template with this parameter, Dynamic Tags are supported. | No |
selfEmail_from | String | From email address of Self Email Notification (Will be seen in Email Client as from example@whateveryoupass.com) | No |
selfEmail_subject | String | Subject field of Self Email Notification, something like “You got a new submission” can be seen in the email client as email subject | No |
selfEmail_sendOnSpam | Boolean | Formcarry won’t send email notifications for submissions that marked as spam by default, set this as true if you want to get email notifications for spam submissions. | No |
selfEmail_logo | Not available yet. | ||
ㅤ | ㅤ | ㅤ | ㅤ |
Respondent Email Notification Parameters | |||
autoResponse | Boolean | Enable Respondent Email Notifications for the form | No |
autoResponse_from | String | From email address of Respondent Email Notification (Will be seen in Email Client as from example@whateveryoupass.com) | No |
autoResponse_theme | “Fancy” or “Formal” or “Custom” | Pass one of Fancy, Formal or Custom, that’s the template of Respondent Email Notification | No |
autoResponse_subject | String | Subject field of Respondent Email Notification, something like “Hi, thanks for contacting us!” that will be displayed in the email client as email subject | No |
autoResponse_message | String | If you pass autoResponse_theme as Fancy or Formal then pass this as your message that you want to be written inside the theme, if you “Custom” theme then use autoResponse_code instead | No |
autoResponse_code | String | Pass your HTML Code for your Respondent Email Notification, Dynamic Tags are supported. Use only if you have passed autoResponse_theme as Custom | No |
autoResponse_logo | Not available yet. |
Example Request:
With curl:
shellcurl -X PUT \
  https://formcarry.com/api/form \
  -H 'Content-Type: application/x-www-form-urlencoded' \
	-H 'api_key: {Replace With Your API Key}' \
  -d 'name=TestForm&email=john@example.com'
With Javascript:
javascript// Create an object to store the request headers
const headers = {
    "api_key": "Change With Your API Key"
};

const params = {
	name: "My New Form",
	// notify these people
	email: "my@email.com, ceo@email.com"
}

// Use the fetch API to send a request with the specified headers
fetch("https://formcarry.com/api/form", {
    headers: headers,
		method: "PUT",
		body: JSON.stringify(params)
})
.then(function (response) {
    // Print the response to the console
    console.log(response);
})
.catch(function (error) {
    // Print any error that occurred
    console.error(error);
});
Example Response:
json{
	"code": 200,
	"title": "Created a new form",
	"message": "Your form was successfully created",
	"type": "success",
	"formUrl": "https://formcarry.com/s/XXXXXXX"
}
Deleting a form with API
API Endpoint: https://formcarry.com/api/form/{Form ID}?apiKey={Your API KEY}
Method: DELETE
Example Request:
With Curl:
shellcurl -X DELETE \
  https://formcarry.com/api/form/{FormID} \
	-H 'api_key: {Replace With Your API Key}'
Example Response:
json{
	"code": 200,
	"title": "Good job mate 💅",
	"message": "Your form was successfully deleted.",
	"type": "success"
}
