
What is Formcarry
Formcarry allows you to collect submissions from your own HTML form, without any back-end code. You can get notification emails for submissions, upload files from your form, benefit from best-in-class spam protection, and integrate with other apps.
How to use formcarry to collect submissions?
Before we start, here’s what you’ll need:
- A Formcarry account
- An HTML form
- Basic Javascript knowledge (optional)
1. Creating an HTML Form
Create a simple newsletter form using HTML:
html<form action="#" method="POST">
	<label for="email">What is your Email Address?</label>
	<input type="email" name="email" id="email">
	<button type="submit">Subscribe</button>
</form>
If you don't have an HTML form yet, check out our free contact form generator to create a customizable contact form that works with Formcarry without any further configuration.

Deeper Knowledge
The most important aspect of an HTML form is the
action="#" attribute, which specifies the URL where you want to process form data. In a typical website, it will look like this:html<form action="https://mysite.com/form.php" method="POST"> <label for="email">What is your Email Address?</label> <input type="email" name="email" id="email"> <button type="submit">Subscribe</button> </form>
This sends form data to
https://mysite.com/form.php, where you would need to write back-end code (in PHP, Node.js, Go, Ruby, etc.) to process the data.Formcarry simplifies this process by providing a unique URL that processes your form without any back-end code. Your unique URL allows you to receive emails from your form, send auto-responses, upload files, and trigger Zapier zaps.
An example Formcarry endpoint looks like this:
https://formcarry.com/s/XXXXXXXX2. Creating a form in Formcarry
Go to your dashboard and click the "Create Form" button at the top right of the navigation:

Click the button and you’ll see the form creation modal:
After creating your form, click the "Setup" tab to see your unique form endpoint. Copy this endpoint.
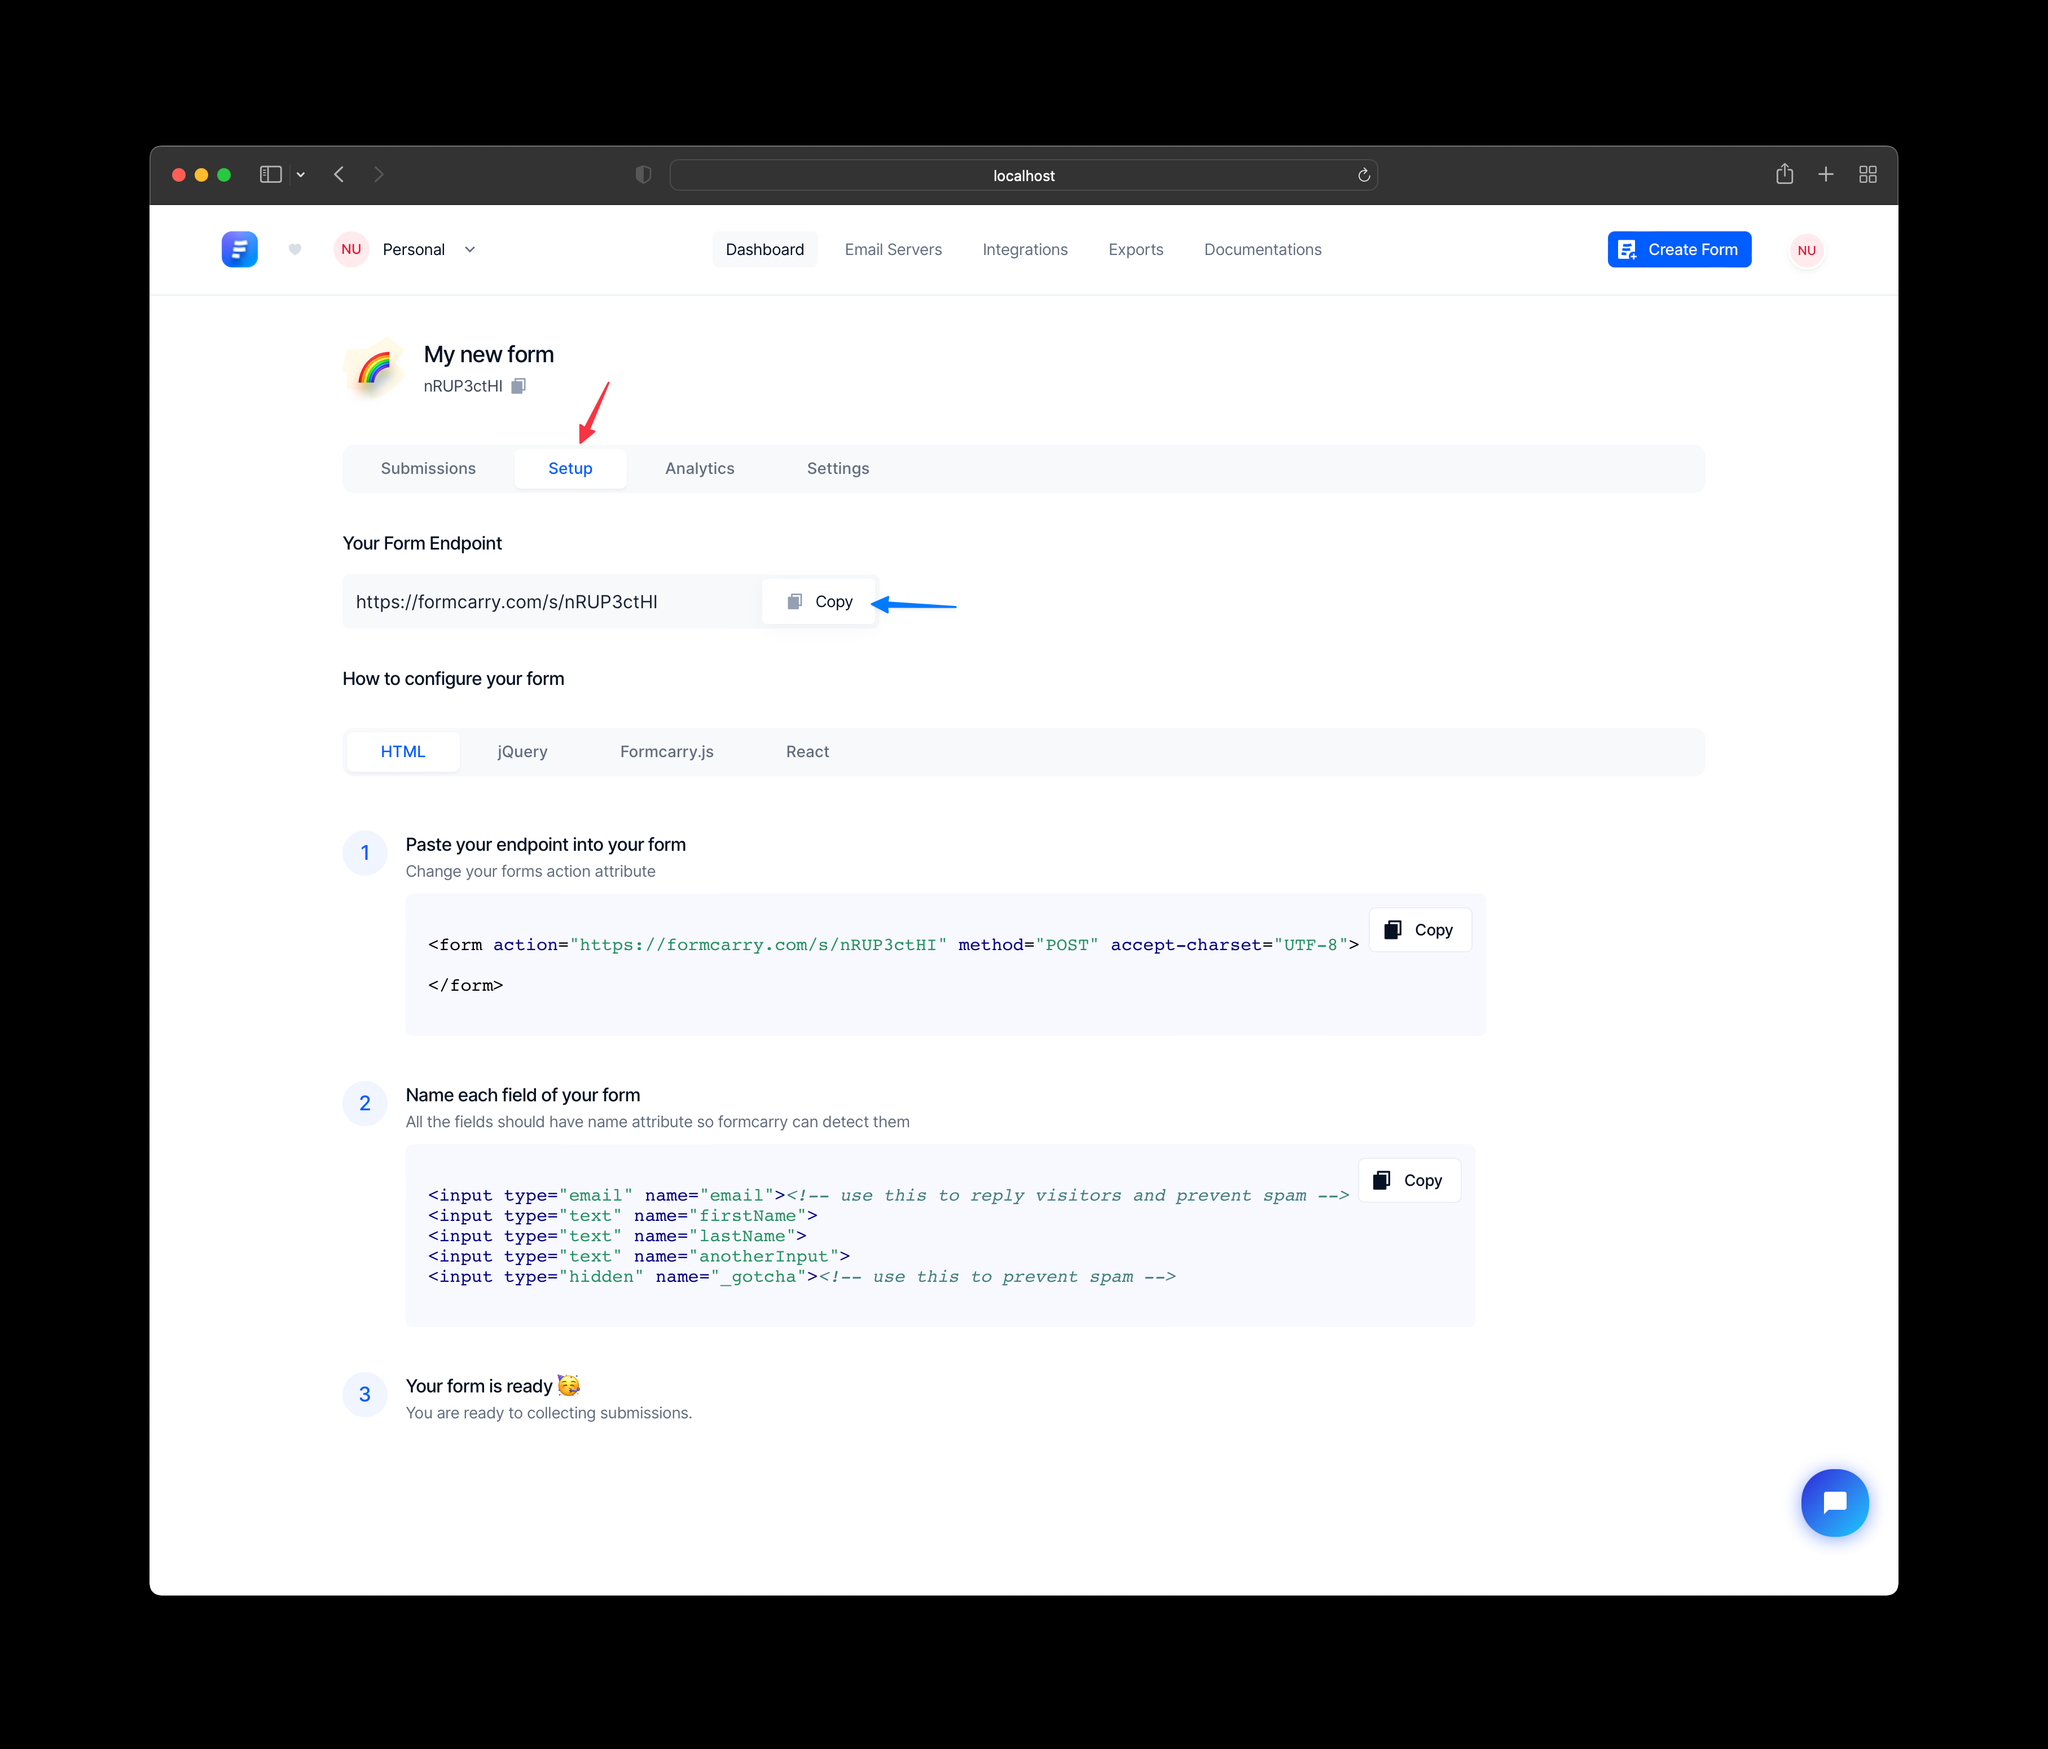
Your unique endpoint is a bridge between your form and formcarry that will deliver submissions.
3. Integrating your form to formcarry
Paste the unique endpoint URL you copied in step 2 into your form's
action attribute:html//this is sample endpoint change it with your endpoint that you copied in step 2 <form action="https://formcarry.com/s/{YOUR UNIQUE ENDPOINT}" method="POST"> <label for="email">What is your Email Address?</label> <input type="email" name="email" id="email"> <button type="submit">Subscribe</button> </form>
That's it! You're now ready to collect submissions.
Important Note: All input fields (input, textarea, select) must have a
name attribute, or Formcarry won't be able to parse the field data.Now, you're ready to collect submissions, let's try it:
To customize your thank you page, take a look at Thank You Pages
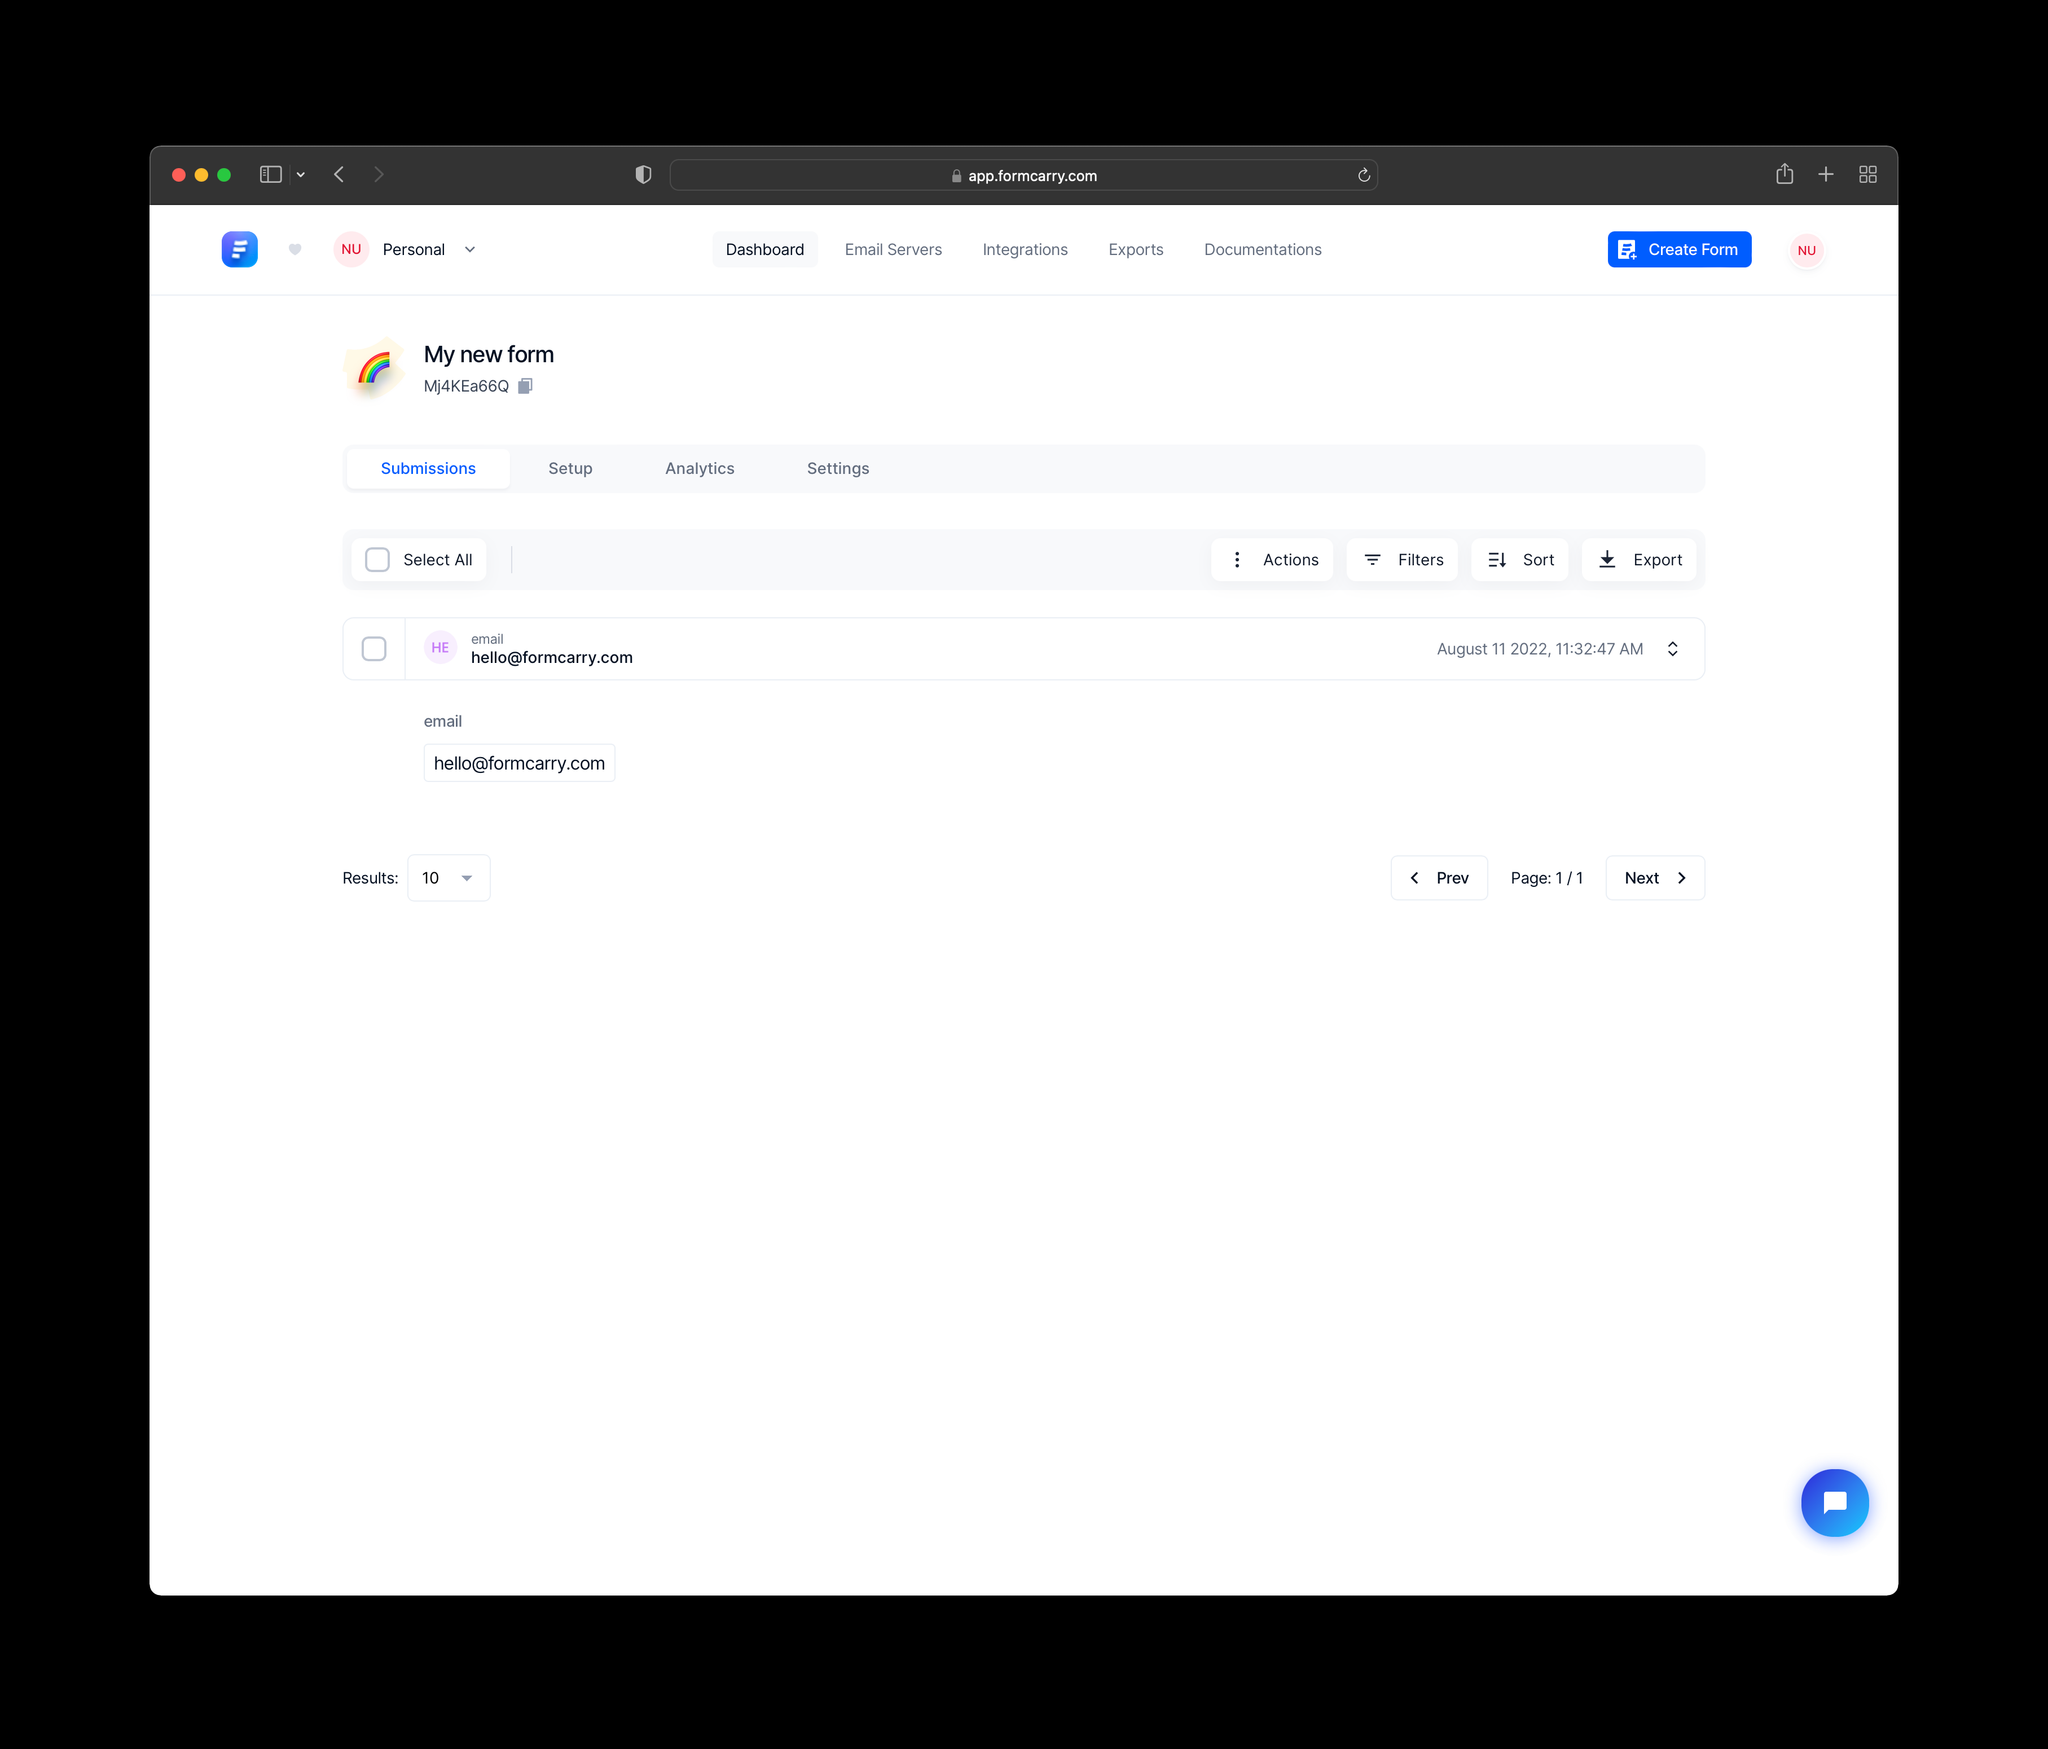
Now, you can view submissions from the dashboard by clicking the "Submissions" tab.
Congratulations! 🎉 You're now ready to take full advantage of Formcarry, including features like:
✅ File uploads
✅ Google ReCaptcha
✅ Spam blocking
✅ Zapier integration
✅ Webhooks
✅ CSV & JSON export
✅ Autoresponses
Do's and Dont's
- Each input field must have a
nameattribute
html<input type="email" name="email">
<input type="text" name="firstName">
<input type="text" name="lastName">
<input type="text" name="anotherInput">
- Content-Type: JSON, form-data, and x-www-form-urlencoded are supported. If you're just using an HTML form without JavaScript, you don't need to worry. However, if you're using JavaScript to make a request, you should set this attribute.
- For file uploads, set the
Content-Typetomultipart/form-data.
- If you want to receive a JSON response message, you must set the HTTP
Acceptheader toapplication/json.